DJI Spark
You’re probably not an experienced drone pilot if you have a fun-to-fly Spark, so check out these short videos to become an expert on the Spark. Beginner tutorials show how to mount the battery and propellers, and how to identify key components and fly within set parameters. The Spark must be activated before it flies the first time—there’s a video for that, too. Click on separate videos for mounting the battery, using the remote controller, linking the remote controller, and using the charger. Learn how to mount propeller guards. Discover how to reset the WiFi SSDI if your Android device doesn’t list it, and how to update firmware for the Spark and the controller. Gather DJI Quick Tips on all the Spark’s Quickshot video modes: Helix, Rocket, Circle and Dronie.
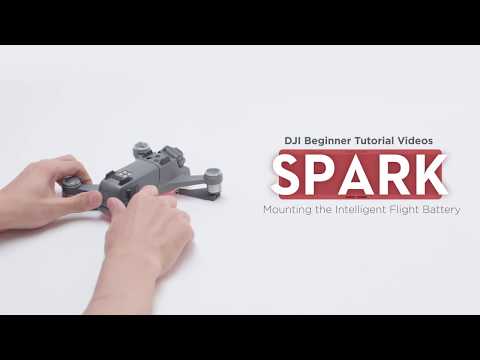
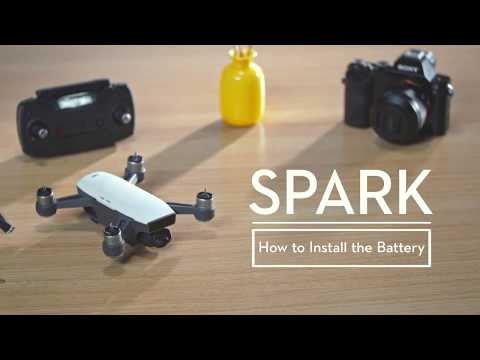
This video will show you how to mount the intelligent flight battery to the spark. Place the intelligent flight battery into the battery compartment. Hold the arms and push the battery to the end with your thumbs. Check whether the battery is mounted firmly. Do not touch the battery buckles on both sides otherwise the battery may become loose. To remove the battery hold the battery buckles and pull under the battery backwards.
DJI Beginner Tutorial Videos - Spark - Mounting the Intelligent Flight Battery
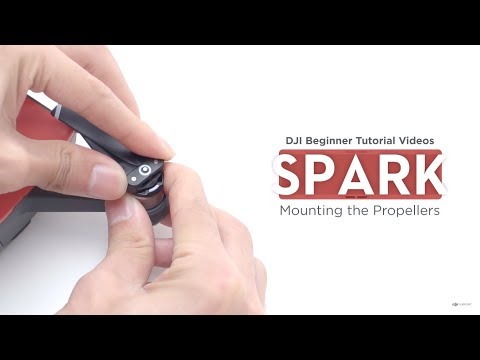
This video will show you how to mount propellers to the spark. There are 2 propellers and 2 motors with white marks and 2 propellers and 2 motors without white marks. The marks indicate which direction the propeller should spin. Attach the propellers with the white rings to the motor mounting plates with the white marks. Press propeller down into the mounting plate and rotate clockwise until it is secured. Attach the unmarked propellers to the mounting plates without marks and rotate anti clockwise to lock them. After installation hold the motor and rotate the propellers to check whether they are mounted in place. To detach the propellers press the propellers down into the motor mounting plates and rotate them in the unlock direction.
DJI Beginner Tutorial Videos | Spark | Mounting the Propellers
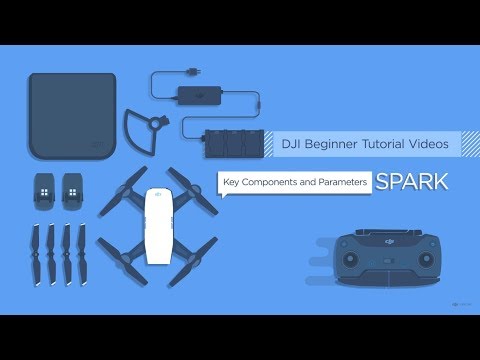
This video will introduce the main modules of the spark. A 3D sensing system is mounted to the front of the aircraft’s nose. It has an infrared model which can detect obstacles under the right conditions. The 2 axis gimbal and camera are located on the underside of the 3D sensing system. The 2 axis gimbal provide stabilization for the camera allowing you to capture stable images and videos. The camera is used to capture images and videos. The gimbal and camera are sophisticated parts and must be well protected when in use. The vision system includes a camera and infrared sensor is located on the bottom of the aircraft which helps the aircraft maintain its current height and location accurately. The intelligent flight battery is to the rear of the vision system and has a maximum flight time of 16 minutes. The 4 LEDs on the battery show the battery level and the square button is the power button. Opening the rear cover of the aircraft you see the Micro USB port used for charging or firmware updates and the Micro SD card slot that hold the UHS-1 Micro SD card that stores photos and videos. At the bottom of each of the 4 arms there is an LED. The 2 LEDs closest to the battery are aircraft status indicators while the other 2 closest to the gimbal and camera are called front LEDs. The motors and propellers are mounted above the arm LEDs providing sufficient power for flight
DJI Beginner Tutorial Videos - Spark - Key Components and Parameters
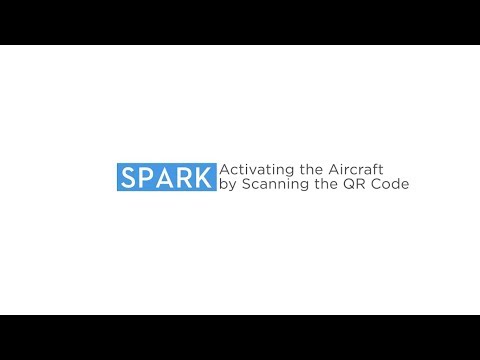
Spark, activating the aircraft by scanning the QR code. Connect the battery to the charger. Wake up the battery and fully charge it. Check and record the Wi-Fi SSID password in the battery compartment or on the storage box. Launch DJI Go 4. Log into your account. Tap the button on the upper right corner. Select san QR code. Scan the SN or QR code on the battery compartment. After scanning is successful turn on your aircraft. Connect your mobile device to the internet. Read the terms of use carefully. Select the rectangle as shown and tap I agree. Confirm your activation account. Tap activate. Disconnect your mobile device from the internet and connect it to the aircraft’s Wi-Fi. After activation is successful name your aircraft. Set the unit of parameter. Turn on beginner mode. If you are flying spark for the first time it is recommended not to turn off beginner mode for slight safety. Turn on enable advanced gesture control. Set a joystick mode, the default mode is mode 2.
DJI Quick Tips - Spark - Activating the Spark by Scanning the QR Code

Spark, activating the spark by using DHI Go 4. Connect the battery to the charger then up the battery and fully charge it. Turn on your aircraft. Power on the remote controller. Check and record the Wi-Fi SSID and password in the battery compartment or on the storage box. Connect your mobile device to the remote controller’s Wi-Fi, the default password is 12341234. Connect your mobile device to the aircraft’s Wi-Fi and enter the default password you’ve recorded. After it connects launch DJI Go 4 app and log into your DJI account. It will prompt you to activate your Spark. Tap next. Read the terms of use carefully. Select the rectangle as shown and tap I agree. Now name your aircraft. Tap continue and set the unit of parameter. Tap continue and turn on the beginner mode. If you are flying spark for the first time it is recommended not to turn off beginner mode for flight safety. Tap continue and turn on enabled advanced gesture control. Tap continue and set a joystick mode. Disconnect your mobile device from the aircraft’s Wi-Fi and connect it to a network with an internet connection. Tap continue and confirm your account. The default activation account is your DJI Go 4 account that cannot be changed after activation. Tap activate and disconnect your mobile device from the internet and connect it to the aircraft’s Wi-Fi. Your Spark has now been activated!
DJI Quick Tips - Spark - Activating the Spark by Using DJI GO 4
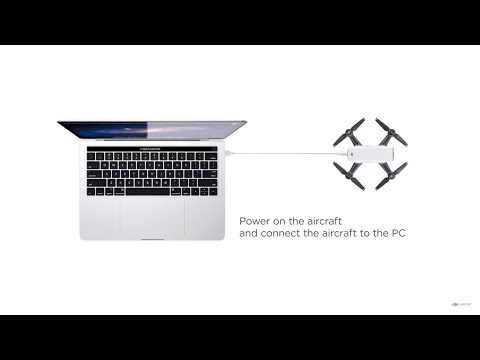
Spark, updating firmware with DJI Assistant 2. Power on the aircraft and ensure that the battery level is more than 50% of total power. Connect the aircraft to a PC or Mac using a Micro USB cable. Launch DJI Assistant 2. Click Spark. Log into the DJI account. Select the update package and click upgrade. Red the tips and then click start update. The aircraft will start updating. Do not power off the aircraft during the update. It is normal that the aircraft restarts automatically during the update. Please wait until the update is complete. After updating restart the aircraft before use. A possible reason and solution to update failure. If the firmware package cannot be transmitted to the aircraft check whether the cable between the aircraft and computer is loose. If the update fails several times, obtain the aircraft update data under black box in the DJI Assistant 2 and contact DJI support
DJI Quick Tips - Spark - Updating the Firmware with DJI Assistant 2
DJI Osmo, restoring default Wi-Fi settings. Power on the Osmo. Hold down the trigger and shutter button at the same time. Pull the power switch down until the system status indicator flashes green. Then release the button. Wi-Fi settings have now been reset. The default Wi-Fi password is 12341234.
Resetting the Wi-Fi SSID and Password

Spark, updating the firmware with DJI Go 4. If you are using your Spark for the first time please update the firmware first. Otherwise the Spark motors cannot start. Power on the aircraft and ensure that the battery power is higher than 50%. Ensure that your mobile device is connected to a network with an internet connection. Then launch SJI Go 4. If there is an update a new firmware is available notification will be shown on the home screen on the DJI Go 4. Tap update now to enter the update firmware screen. Tap download now. After the firmware had been downloaded connect to the aircraft’s Wi-Fi and tap start update. Do not power off the aircraft during the update. Do not leave DJI Go 4. It is normal that the aircraft restarts automatically. Please wait until update is complete. If a Wi-Fi disconnected warning is shown reconnect to the aircraft’s Wi-Fi. After the update is complete tap OK on the update complete prompt. It is recommended to restart the aircraft again manually before using it. At the same time normal will be shown besides overall statue under the aircraft status.
When any modules (battery’s) firmware version is inconsistent and inconsistent firmware found prompt will pop up. Slide the slide up to update slider to the right to start the update. Update notices are the same as those for the aircraft firmware update. After updating is successful tap OK. It is recommended to restart the aircraft manually before using it. If the update fails several times then try to update the firmware with DJI Assistant 2. If the issue cannot be fixed obtain the aircraft update data black box in the DJI Assistant 2 and contact DJI Support.
DJI Quick Tips - Spark - Updating the Firmware with DJI GO 4
Spark, updating the remote controller firmware. Ensure that the remote controller’s power is higher than 30%. Power on the remote controller. Turn on the Wi-Fi on your mobile device and connect it to the remote controller. The default password is 12341234. Launch DJI G0 4. A new firmware update is available notification will be shown on the home screen pf DJI Go 4. Tap update now. Disconnect your mobile device from the remote controller’s Wi-Fi and connect it to a network with an internet connection. Return to DJI Go 4 and tap download now. If the download fails check whether the internet connection is normal and download the firmware again. Return to the DJI Go 4 and the remote controller will start updating automatically. It will take about 3 minutes to update. Do not power off the remote controller or exit the DJI Go 4 app screen. After the update is complete tap OK on the update complete prompt. Restart the remote controller before use. If the update fails update the firmware again. If the remote controller cannot be tuned off normally press and hold the flight pause button then press the power button and press again and hold the power button to turn off the remote controller.
DJI Quick Tips - Spark - Updating the Remote Controller Firmware

Spark, mounting propeller guards. There are 2 propeller guards with white marks and 2 guards without white marks. Attach the propeller guards with white marks to the motors with white marks. Attach the unmarked propeller guards to the motors without white marks. Unlock the buckle. Align the motor slot on the guard with the arm and mount it from the bottom of the motor as shown. Rotate the propeller guard in the lock direction until it is secured. Fasten the buckle. When a click is heard the propeller guard is mounted firmly. Perform the proceeding steps to mount the other propeller guards.
DJI Quick Tips - Spark - Mounting Propeller Guards

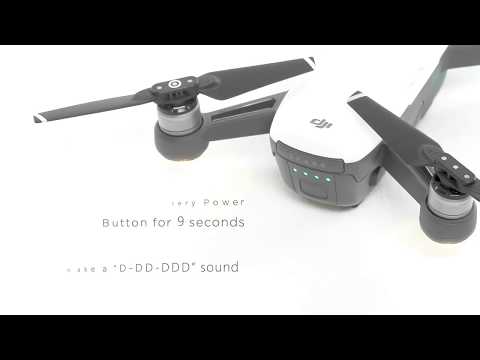
This video will show you how to control the Spark aircraft with the remote controller. Power on the remote controller and aircraft. The remote controller in the Spark fly more combo has been linked to the aircraft before delivery. If the status LED on the remote controller is solid red it indicates that the remote controller need to be linked with the aircraft. Press and hold the power button for about 3 seconds. Release the button and the aircraft makes a “D’ beep then the front LEDs blink red slowly and the remote controller is linking. Press and hold the flight pause button, function button and customizable button simultaneously. When the status LED on the remote controller is solid green it indicates that linking is successful. Connect your mobile device to the remote controller’s Wi-Fi SSID Spark-RC-XXXXXX. The default password is 12341234. Launch DJI Go 4 and then you can use the remote controller to control the aircraft and get image transmission. If you want to control the aircraft with a mobile device disconnect the remote controller press and hold the power button for 6 seconds. When the aircraft makes a “D-DD” sound the aircraft is not connected to the remote controller. The mobile device can connect to the aircraft’s Wi-Fi SSID. You can check the aircraft’s Wi-Fi password SSID in the battery compartment or storage box. If connect fails several times contact DJI support
DJI Spark - Controlling the Aircraft with the Remote Controller

QuikcShot, circle mode. Launch your DJI Go 4 app, make sure your spark is set to p-mode. Select QuickShot. Select your target subject on the screen with 1 finger. Tap circle. Tap the circle icon again to adjust the flight direction. Tap go to begin flying. Then the aircraft will focus on your target subject. The maximum flight speed is 6m/s. with a fixed radius of distance between the aircraft and the subject and circle around your target subject taking a 10 second video.
DJI Quick Tips - Spark - QuickShot Circle Mode
QuickShot, drone mode. Launch your DJI Go 4 app, make sure your spark is set to p-mode. Select QuickShot. Select your target subject on the screen with 1 finger. Tap dronie. Tap the dronie icon again to adjust the flight distance (the default distance is 40m). Tap go to begin flying. Then he aircraft will fly backwards first and ascend at an angle with the camera locked on the target subject taking a 10 second video. The maximum flight speed is 3m/s
DJI Quick Tips - Spark - QuickShot Dronie Mode
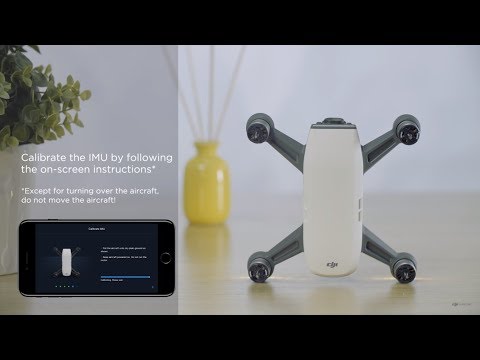
Spark, calibrating the IMU. If the app prompts you to calibrate the IMU please calibrate it. Remove the propeller before calibration. Power on the aircraft and connect it to DJI Go 4. Go to main controller settings, sensors and Calibrate IMU. Calibrate the IMU by following the on screen directions. Except for turning over the aircraft. Do not move the aircraft! After calibration restart the aircraft. If calibration faisl several times export the flight controller data and black box data upload them to the DJI server and contact DJI support
DJI Spark - Calibrating the IMU
Spark, how to install the battery. Place the intelligent flight battery in the battery component. Hold the arms and push the battery to the end with the thumbs. Do not hold both sides of the aircraft or the battery may not be mounted firmly. Push and pull the battery to check whether it is firmly mounted. When holding the aircraft (for palm launch) do not touch the battery buckles on either side. Otherwise the battery may become loose.
DJI Quick Tips - Spark - How to install the Spark's Intelligent Battery
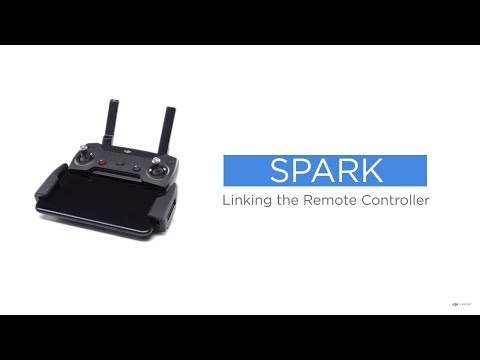
Spark, linking the remote controller. This video will show you how the Spark remote controller. There are 2 ways to link the remote controller. 1. Linking the remote controller with the DJI Go 4. Power on the remote controller and aircraft. Connect your mobile device to the remote controller’s Wi-Fi. The default password is 12341234. Press and hold the power button on the intelligent flight battery for about 3 seconds. Release the button after you hear a beep. The front LEDs will blink red. Launch DJI Go 4. Tap RC connected and remote controller. Then tap remote controller linking. When the remote controller makes a beeping sound it starts linking. Ensure the remote controller is within 20cm (0.66ft) of the aircraft during linking. When the front LED turns solid red and the status LED on the remote controller is solid green the linking is successful.
2. Linking the remote controller without a mobile device. Power on the remote controller and aircraft. Press and hold the power button on the intelligent flight battery for about 3 seconds. Release the button after you hear a beep. The front LEDs will blink red. Press and hold the flight pause button, function button and customizable button simultaneously. Release the buttons when the remote controller makes a beeping sound. Then the remote controller starts the linking process. Ensure the remote controller is within 20cm (0.66ft) of the aircraft during linking. When the front LED turns solid red and the status LED on the remote controller is solid green the linking is successful. If linking fails several times contact DJI support.
DJI Spark - Linking the Remote Controller

Spark, using the portable charging station. This video will show you how to use the Spark portable charging station. Toggle the securing board switch to open the securing board. Insert the battery and push it to the end as shown to secure it in place. Ensure that the battery is mounted properly. Place the aircraft with the battery into the charging station. The middle charging contact can only charge a battery connected to an aircraft. Close the securing board. Fasten the buckle. The aircraft’s propellers can be stored inside the securing board. Connect the charging station to the charger ad start charging the aircraft and batteries. The charging station will first charge the battery in the aircraft and then it will charge the 2 spare batteries in accordance with their power levels from high to low. When charging the charging station will also charge itself. The USB port at the bottom of the charging station can be used to charge a mobile device. When the aircraft is powered on the batteries are turned on after being placed into a turned on charging station the aircraft or batteries will power off automatically.
The 2 battery LED indicators refer to the status of the batteries. When the indictor is pulsing green it is charging. When the indicator is solid green it is fully charged. When the indicator is solid red there is an error with the battery. When the indicator is solid yellow it is ready for charging. A hibernated battery can only be charged after waking up. The charging station can still supply power to the aircraft and batteries it if has sufficient power once the power cable is disconnected. Press the power button once then again and hold it to power on the charging station. Note that when the charging station’s power is less than 5% the station will stop charging and turn off automatically. When charging is complete or the charging station fails to detect any devices for 30 seconds the station will turn off automatically. To stop charging press the power button once then again and hold to power off the charging station.
DJI Spark - Using the Spark Portable Charging Station
Spark, exporting flight data. In flight controller data. Power on the aircraft and connect the aircraft to the PC. Exporting the flight controller data. Click the spark icon. Click upload button. Select the flight controller data you require, tick the file and click save to local. DJI Assistant 2 will automatically download the data. Please wait until the download is complete. Then click complete. Ensure the aircraft is connected to the PC during the download. Black box data. Click black box. Click save to local. When a prompt pops up it indicates that the export is successful. Flight controller LOG data. Connect your mobile device to the PC. Launch iTunes and click apps. Scroll down the bar under the apps column. Select DJI Go 4. Then find out and select the FlightRecords folder under the DJI Go 4 documents column. Click save to and export the folder. Please upload the flight controller data and black box data to the DJI server and then provide DJI support with the sever link. The earlier flight controller data will be overwritten when the space is full. Please export the flight controller data and black box data as soon as possible when the issue occurs. Do not power off the aircraft repeatedly. Otherwise the flight controller data of this aircraft will be overwritten.
DJI Quick Tips - Spark - Exporting the Flight Data
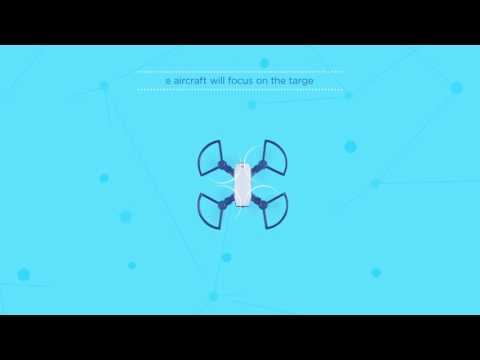
Helix mode. Launch your DJI Go 4 app. Make sure your spark is set to p mode, select QuickShot. Select your target subject on the screen with 1 finger. Tap helix. Tap the helix icon again to adjust the flight distance (the default distance is 40m) and direction. Tap go to begin flying. Then the aircraft will focus on the target subject. The maximum flight speed is 6m/s. Fly upwards and spiral around the subject taking a 10 second video.
DJI Quick Tips - Spark - QuickShot Helix Mode
QuickShot, rocket mode. Launch your DJI Go 4 app, make sure your spark is set to p-mode. Select QuickShot. Select your target subject on the screen with 1 finger. Tap Rocket. Tap the helix icon again to adjust the flight distance (the default distance is 40m). Connecting with the remote controller is 10 – 90m. Connecting with the mobile device is 10 – 45m. Tap go to begin flying. The aircraft will fly directly above the target subject and then ascend with the camera facing downward taking a 10 second video. The maximum flight speed is 2m/s.
DJI Quick Tips - Spark - QuickShot Rocket Mode
