DJI OSMO
An Osmo handheld gimbal covers a lot of ground, and so do these videos. Choose videos for tips on the Osmo, Osmo Mobile, and Osmo Pro, plus the Android-only Osmo Raw video adapter. Osmo videos include activating the Osmo; separately, locking and unlocking the gimbal; upgrading the firmware; flashing the firmware; returning to default WiFi settings; mounting the Zenmuse M1 smartphone gimbal; turning on Record Audio; attaching and using the extension rod and tripod; and using the vehicle mount, including cautions on the performance of the suction cups. Osmo Mobile topics include mounting and balancing your smartphone; separately, upgrading the firmware with or without DJI Assistant 2; activation and setup; and reducing shakiness by doing the so-called Ninja walk. The single Osmo Raw video covers connecting the wired video adapter. You can also learn how to distinguish between a charger or battery problem.

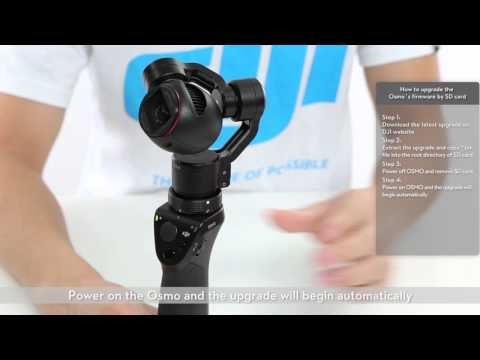
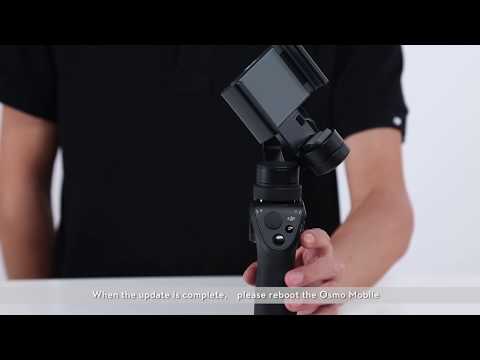
This video will show you how to upgrade the firmware on your DJI Osmo Pro/Raw. The upgrade method is the same fir the DJI Osmo Pro and Raw. We will use an Osmo Pro in this video. You can only upgrade Osmo Pro firmware via an SD card. Please ensure the Osmo Pro’s battery is fully charged and there is at last 200MB of free space on the SD card before upgrading. Please ensure the Osmo is upright during the upgrade. It is recommend to place the Osmo on its base during the upgrade. Upgrading should be completed within 30 minutes. Please download the latest upgrade package from the official DJI website. Extract the upgrade package and copy the .bin file into the root directory of the Micro SD card. Ensure the Osmo Pro is powered off and insert the Micro SD card into the SD card slot on the camera. Turn on the Osmo Pro and the camera status indicator will display solid yellow or flash red and green alternatively to indicate the upgrade is in progress. The Osmo Pro’s status indicator will display solid green when the update is completed successfully. If the update has failed the indicator will display solid red. When the update is complete please reboot the Osmo Pro. Connect to the DJI Go app, go to settings, general and about and check the firmware version number. If the update fails please try to update again. If the update fails again please select me in the DJI Go app and contact DJI support
OSMO Pro Tutorial Video - Upgrading Firmware
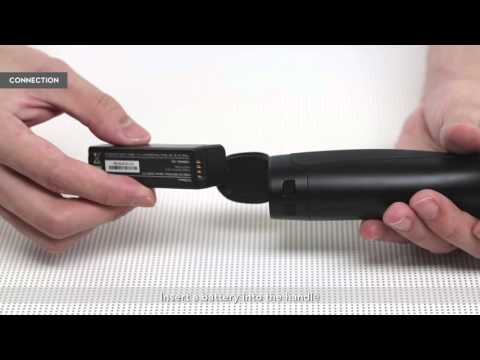
This video will show you how to assess whether or not your Osmo battery or battery charger are damaged. Battery charger. Appearance. Check if the AC cable port is mechanically damaged and if the metal surface is turning black or burnt. Check if the 4 pins for connecting the battery charger are mechanically damaged and if the metal surface is turning black or burnt. LED. If you don’t connect the AC cable the LED should be off. Even if the AC cable is not connected the LED should still turn green when the battery is inserted. Function and performance. Connect the AC cable to a power outlet and measure the 1st and 4th pins’ voltage with a multimeter. Voltage should be between 12.50V and 12.7V. With the charger plugged in attach a battery without full charge. The LED should go from green to red. When the battery is fully charged the LED should turn green again. It is recommended to use 2 or more batteries for the assessment. Battery. Appearance. Check if the battery is mechanically damaged and if the 4 pin connection points are turning black or burnt. Connection. Attach a battery without full charge to the battery charger by pushing the battery to the 4 pins on the charger. Insert a battery into the handle. Open the bottom cover, push in the battery and check if it can be powered on. Insert multiple batteries into the battery charge or handle and check if the Osmo behaves as intended with each battery. Functions and performance. Measure the voltage of pins 1 and 4 with a multimeter. Voltage should be between 9V and 12.7V. if the voltage is 0 please place the battery into the battery charger and charge it for 1 – 5 minutes and then measure the voltage again. If the voltage is still 0 the battery is damaged. Insert the battery into the handle bar, power on the Osmo and check battery information in the app. Check if the cell voltages and total voltages are normal.
OSMO Tutorials - Osmo Battery and Charger Damage Assessment

Capture memories and share life’s moments more easily and more cinematically than ever with the Osmo Mobile. It turns your smart phone into a smart motion camera making every moment you shoot look smooth and professional. This video will show you how to capture stable shots with your Osmo Mobile. The Osmo Mobile can pitch, roll and pan. When you’re walking around shooting video with your smart phone the Osmo Mobile smoothes and even cancels out the movements you make stopping camera shakiness and turning every shot into cinematic video. However vertical movements still need to be controlled. The ley to capturing stable shots is how you walk. Bend your knees slightly and relax, walk heel to toe and walk at a steady speed. Keep an eye out for any shakiness on screen. Keep your elbow relaxed to smooth out movements. Using these techniques you’ll get smoother shots than ever before. To demonstrate the effectiveness of what some call the ‘ninja walk’ here’s a comparison video. In upright mode the gimbal won’t shake significantly if you walk using the techniques mentioned before. If you just walk normally the Osmo Mobile will move vertically and the screen will shake. Practice your technique and your footage will get more and more stable over time.
DJI OSMO Mobile - Reducing Shakiness
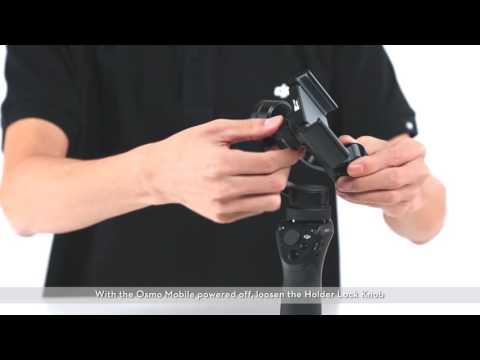
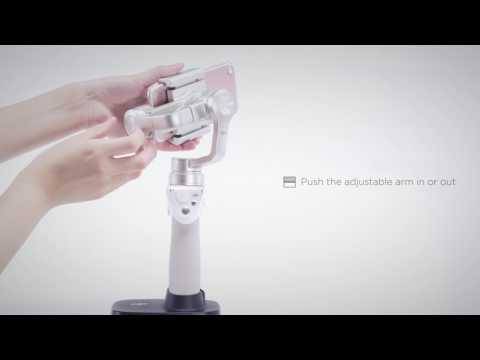
This video will show you how to activate and setup your Osmo Mobile. To activate your Osmo Mobile first prepare the battery then activate the gimbal. Preparing the battery. Insert the battery into the Osmo Mobile can connect the power cable. The battery is charging if the system status LED slowly changes from light to dark and back to light again. The battery is fully charged when the system status LED turns green. The Osmo Mobile should only be powered on after the battery is fully charged. Otherwise the gimbal will not work. Activating the gimbal. Enable Bluetooth on your mobile device. Pull down and hold the power switch for 1.5 seconds then release the switch. The system status LED will blink green then turn solid green. This means the Osmo Mobile has been powered on successfully. Open the DJI Go app. DJI will automatically detect the Osmo Mobile. Connect to the device. DJI Go will display an activation prompt. Enter your DJI Go account to finish activation. Please note that a brand new Osmo Mobile should be connected to a Wi-Fi or mobile network for activation. Setting up the Osmo Mobile. With the Osmo Mobile powered off loosen the holder lock knob. Do not power on the Osmo Mobile without a mobile phone. If a mobile phone is not detected by the mobile phone detection sensor the Osmo Mobile will not work. Place your mobile phone in the holder and tighten the knob to secure its position. Use the adjustable arm to level your phone. If your phone tilts to the left pull out the adjustable arm. If your phone tilts to the right shift the phone to the left. Enable Bluetooth. Pull down and hold the power switch for 1.5 seconds then release the switch. The gimbal will center itself. Open the DJI Go app, click to connect the Osmo Mobile. The camera status LED will turn blue once it is connected to the Osmo Mobile. Enter the camera and you can start using your Osmo Mobile. If your mobile device has already been connected to the Osmo Mobile simply enter the DJI Go app to connect.
Osmo Mobile Activation and Setup
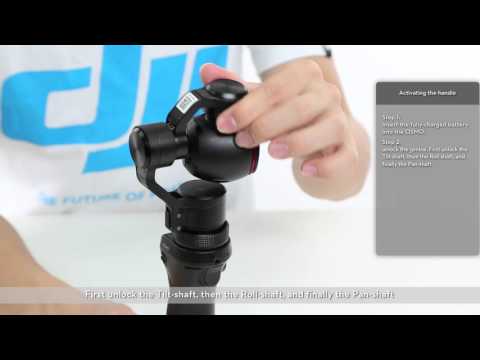
In this video you will learn how to activate your DJI Osmo. The Osmo activation process has 2 parts: activating the battery and activating the handle. The battery is activated by charging. Connect the battery with the battery charger. The battery has begun charging when the LED light turns red. When using the Osmo for the first time make sure the battery is fully charged. The battery will be fully charged and completely activated when the LED light turns green. Insert the fully charged battery into the Osmo and unlock the gimbal. First unlock the tilt shaft then the roll shaft and finally the pan shaft. After the unlocking is finished power on the Osmo. The gimbal will remain powerless until activation is complete. The LED on the Osmo should turn solid green and the fan should turn on. Connect your mobile device to the Osmo’s Wi-Fi network. The default password is 12341234. Open the DJI Go app and enter the camera interface. When the activation reminder appears press next step. Note: Some Android devices may be unable to show the activation reminder. If so please finish activation using an IOS device. Enter your email address. If your IOS device is connected to a mobile network the app will automatically use mobile data to activate the device. If you’re using an Android device or can’t use a mobile network connect to an available Wi-Fi network. Return to the DJI Go interface and press activate. Then reconnect to the Osmo Wi-Fi network return to the app interface and press activate device. The app will notify you when activation is complete
OSMO Tutorials - Activation Steps Before Using OSMO
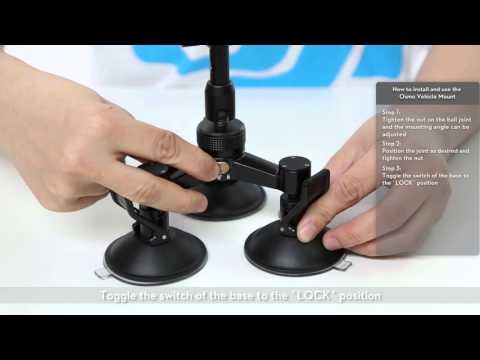
This video will show you how to install and use the Osmo Vehicle Mount. The Vehicle Mount consists of 2 parts: the universal joint and the suction cap base. Tighten the nut on the ball joint and the mounting angle can be adjusted. Position the joint as desired and tighten the nut. Toggle the switch of the base to the lock position. Find a smooth surface on which to secure your mount. Ensure the suction cups and the surface are clean and without dust. Then stick the suction cups to the surface. Pull the lock on the suction cups after they’re attached to the surface. Screw the Osmo onto the Vehicle Mount’s rosette mount and tighten the lock ring. After adjusting to the desired angel tighten the nut on the ball joint. Please note: when travelling at speeds over 100km/hour or if your vehicle is accelerating quickly your Osmo will go into gimbal into protection mode. Also in low temperature conditions the grip of the suction cups will decrease. Make sure you’re using your vehicle mount responsibly and in the right situations.
OSMO Tutorials - How to install and use the OSMO Vehicle Mount
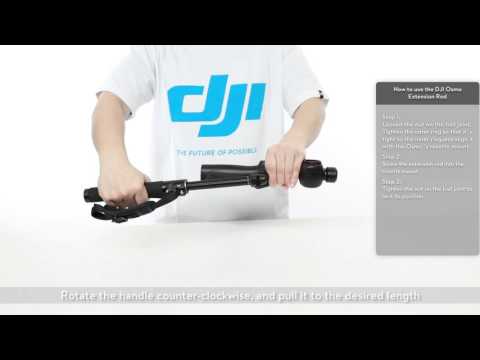
OSMO Tutorials-How to Install and Use the OSMO Extension Rod and Tripod
OSMO Tutorials-How to Install and Use the OSMO Extension Rod and Tripod
This video will show you how to upgrade the firmware on your Osmo Mobile. Please ensure that your mobile device is not mounted to the Osmo Mobile and the battery level is greater than 50%. Turn on the Osmo Mobile. Enable Bluetooth and connect to the DJI Go app. If the firmware needs to be upgrade the DJI app will let you know. When updating the firmware in app please click the update notification and connect your mobile device to a Wi-Fi network. The upgrade will start downloading automatically. When the download is complete click to start upgrading. The system status LED will flash green and red alternatively to indicate the upgrade is in progress. It will take about 10 minutes to upgrade. The system status LED will turn solid green when the upgrade is completed successfully. The app will notify you when the update is complete. When the upgrade is complete please reboot the Osmo Mobile. Connect to the mobile device, go to app, settings, general, and version and check the current firmware version number. If the app displays that the upgrade has failed or the system status LED flashes red and green alternatively for more than 20 minutes please reboot the device and try to upgrade again. If the upgrade fails again please contact DJI support.
OSMO Tutorials- How to upgrade the DJI OSMO's firmware
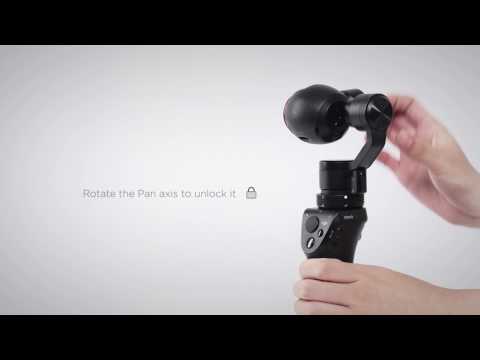
DJI Osmo, unlocking the gimbal. Rotate the roll axis to unlock it. Rotate the pan axis to unlock it. Power on the Osmo
Unlocking the Gimbal
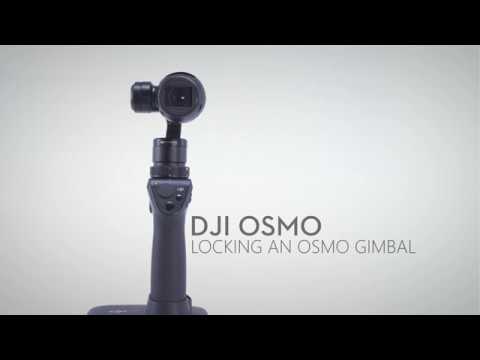
DJI Osmo, locking an Osmo gimbal. Rotate the roll axis to lock it in place. Rotate the tilt axis to lock it in place. Pull the pan axis lock down. Rotate the pan axis to the locked position.
Locking an Osmo Gimbal
Balancing a Mobile Phone
Balancing a Mobile Phone
Osmo, turning on the record audio. Power on the Osmo. Connect the mobile device to the Osmo’s Wi-Fi network. Launch DJI Go. Tap the camera icon on the screen and enable record audio under audio control. Then you can choose whether to record sounds when recording a video
DJI Quick Tips - Osmo - Turning on Record Audio
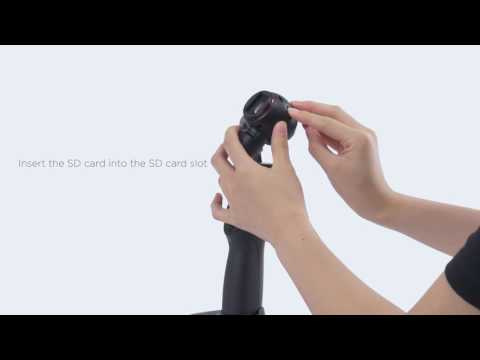
Osmo flashing the firmware. If the update fails or the firmware is required to be updated perform the following steps to flash the firmware: to download the latest Osmo firmware visit http://www.dji.com/osmo/info#downloads. Download the latest Osmo firmware and copy it to the root directory of the SD card. Insert the SD card into the SD card slot in the camera when the Osmo is powered off. Press trigger, record button and power switch at the same time for 3 seconds and release them. It is updating when the camera status indicator blinks red and green alternatively. Wait for about 15 minutes. When the camera status indicator is solid green the update is complete.
DJI Quick Tips - Osmo - Flashing the Firmware
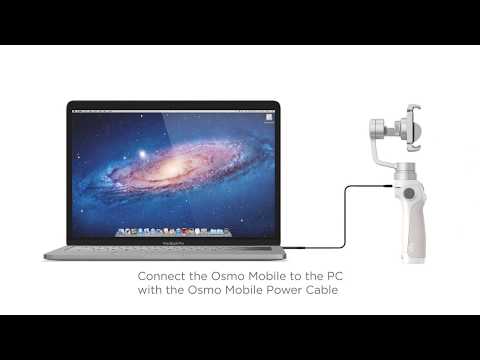
Osmo Mobile, updating the firmware with DJI Assistant 2. Connect the Osmo Mobile to the PC with the Osmo Mobile power cable. Turn on the Osmo Mobile. Launch DJI Assistant 2. Log into you DJI account. Select the latest firmware version and click Upgrade.
DJI Osmo Mobile - Updating the Firmware with DJI Assistant 2
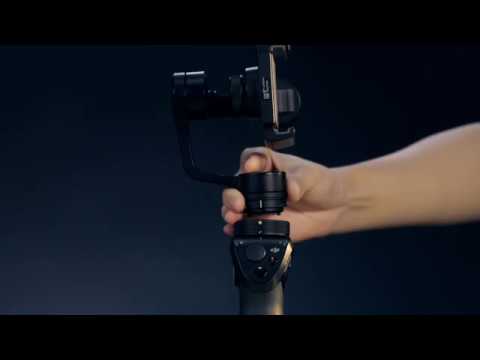
Mount the Zenmuse M1. Rotate the gimbal. Lock it clockwise to unlock it. Align the white dot on the gimbal lock with the white line on the handle. Mount the Zenmuse M1 to the handle. Align the white line with the white dot and rotate the gimbal lock to lock it.
Mounting the Zenmuse M1
This video will show you how to upgrade the firmware on your Osmo Mobile. Please ensure that your mobile device is not mounted to the Osmo Mobile and the battery level is greater than 50%. Turn on the Osmo Mobile. Enable Bluetooth and connect to the DJI Go app. If the firmware needs to be upgrade the DJI app will let you know. When updating the firmware in app please click the update notification and connect your mobile device to a Wi-Fi network. The upgrade will start downloading automatically. When the download is complete click to start upgrading. The system status LED will flash green and red alternatively to indicate the upgrade is in progress. It will take about 10 minutes to upgrade. The system status LED will turn solid green when the upgrade is completed successfully. The app will notify you when the update is complete. When the upgrade is complete please reboot the Osmo Mobile. Connect to the mobile device, go to app, settings, general, and version and check the current firmware version number. If the app displays that the upgrade has failed or the system status LED flashes red and green alternatively for more than 20 minutes please reboot the device and try to upgrade again. If the upgrade fails again please contact DJI support.
Osmo Mobile Tutorial Video - Upgrading Firmware
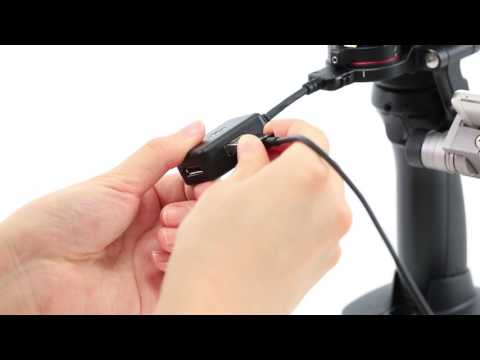
This video will show you how to connect to the Osmo Raw wired video adapter. These steps also apply to the Osmo Pro. Take note of the following information before connection: 1. The Osmo Raw wired video adapter only supports the Zenmuse X5 and Zenmuse X5R. It cannot be used with the Zenmuse X3 or Zenmuse Z3. 2. The Osmo Raw wired video adapter is incompatible with ISO devices due to an ISO system limitation. The Osmo Raw wired video adapter needs to be used with Android v4.4.0 or later and DJI Go v3.1.5 or later. Also Osmo Raw firmware needs to be upgraded to v1.4.0.70 or later. Connecting the Osmo Raw wired video adapter without the DJI Focus handwheel. With the Osmo Raw powered off connect the communication port on the wired video adapter to the communication port on the X5 adapter. Connect the USB port on the wired video adapter to your mobile device using an appropriate cable according to your mobile device’s port. After connection power on the Osmo Raw and launch DJI Go. If DJI Go and DJI Go 4 are installed on the mobile device use DJI Go. Connecting the Osmo Raw wired video adapter with the SJI Focus hand wheel. After the USB port on the wired video adapter is connected to your mobile device connect the wired video adapter to the communication port on the DJI Focus hand wheel with a dedicated communication cable. The USB cable needs to be purchased separately based on the DJI Focus hand wheel mode. Power on the Osmo Raw and launch DJI Go. If DJI Go and DJI Go 4are installed on the mobile device use DJI Go
DJI Osmo Raw - Connecting the Wired Video Adapter
