DJI Goggles
Get help on connecting to your aircraft by viewing the “Connecting the Aircraft” video. Watch “Activating the DJI Goggles” for instructions on using either DJI Assistant 2 and a computer, or DJI Go 4 and your smartphone or tablet. A separate video explains activation of the OcuSync Air unit, which streams live video. Find out how to update the DJI Goggles firmware and, if you choose, the goggles and Mavic Pro firmware simultaneously. You’ll also find a video that explains the main screen and goggles operation, and one that demonstrates reconnecting a third-party remote controller and flight controller.
DJI Goggles support a wide range of aircrafts. This video will show you how to connect the DJI Goggles to the aircraft. Connecting the DJI Goggles to the Mavic Pro. Power on the remote controller and the aircraft. Ensure that the remote controller is linked with the aircraft. Power on the DJI Goggles. In the main screen click tools, settings, linking settings, quick linking, confirm. Press the linking button on the aircraft and press confirm on the goggles to complete the linking. When using the DJI Goggles with
Mavic Pro you can connect the mobile device to the remote controller and launch DJI Go 4 at the same
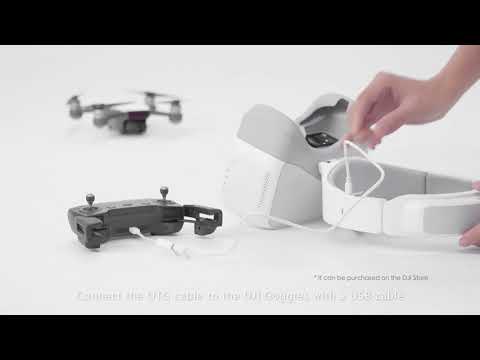
time. Connecting the DJI Goggles to other DJI aircraft. Take the Spark as an example. Insert the OTG
cable to the Micro USB port on the remote controller. Connect the OTG cable to the DJI Goggles with a
USB cable. Power on the remote controller and aircraft. Ensure that the remote controller has linked to
the aircraft. Turn on the DJI Goggles. Then the Spark can be controlled by the DJI Goggles. Take the
Phantom 4 as an example. Power on the remote controller and aircraft. Ensure that the remote
controller is linked to the aircraft. Power on the DJI Goggles. Connect the DJI Goggles to the remote
controller with a USB cable. DJI Goggles can be connected to the remote controller with an HDMI cable
and serve as monitor only. For supported models and functions you can refer to the controlling the
aircraft section in the DJI Goggles user manual
DJI Goggles Connecting the Aircraft
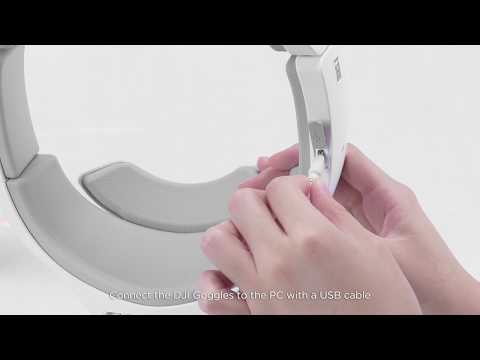
This video will show you how to activate the DJI Goggles. There are 2 ways to activate the DJI Goggles. 1. Activating the DJI Goggles with DJI Assistant 2. Visit the DJU Goggles webpage at dji.com and download the correspond DJI Assistant 2. After installing launch DJI Assistant 2 and log into your DJI account. Power on the goggles. Select the language as required. Click next, read the terms of use carefully and select the rectangle as shown. Click next. Choose with DJI Assistant 2. Click next. Connect the DJI Goggles to the PC with a USB cable. Click on the DJI Goggles icon. An activation prompt will pop up in DJI Assistant 2. Click start activation. Confirm that your DJI account is correct, click confirm your account. Activation is complete. Activating the DJI Goggles with DJI Go 4. Power on the Mavic Pro remote controller and aircraft. Ensure that the remote controller has been linked with the aircraft. Launch DJI Go 4. Log into your DJI account. Power on the googles, select the language as required. Click next. Read the terms of use carefully and select the rectangle as shown. Click next. Choose with mobile device, click next. Linking DJI Goggles prompt is shown on the DJI Goggles. Press the link button on the Mavic Pro and await for the linking is complete to appear. Click complete. Click confirm to start activating. An activation prompt will pop up on DJI Go 4. Click next. Read the DJI product terms of use carefully. Select the rectangle as shown and tap I agree. Confirm that your DJI account is correct. After the confirmation click activate. The DJI Goggles will start activating. DJI Go 4 automatically activates the DJI Goggles
DJI Goggles - Activating the DJI Goggles
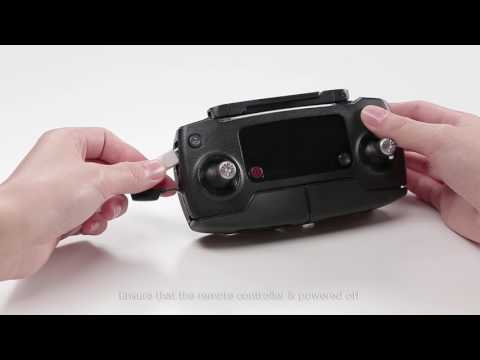
This video will show you how to update the DJI Goggles firmware. 1. Updating the DJI Goggles firmware with DJI Assistant 2. Download the DJI Assistant 2 software from the DJI Goggles webpage on dji.com and install it. Launch DJI Assistant 2, log into your DJI account. Power on the DJI Googles and connect the DJI Goggles to the PC with a USB cable. Click the DJI Goggles icon and enter the firmware update screen. Select the newest firmware version and click upgrade. Click start update. When the download is complete DJI Assistant 2 will update the firmware automatically. 2. Updating the DJI Goggle and the Mavic Pro simultaneously. Ensure that the remote controller is powered off. Connect the remote controller to the PC with a USB cable. Then power on the Mavic Pro remote controller aircraft and DJI Goggles. Ensure that the remote controller is linked with the aircraft. Launch DJI Assistant 2, click RC for Mavic Pro. Select the newest firmware version and click upgrade. Click start update. When the download is complete DJI Assistant 2 will update the firmware automatically. 3. Updating the DJI Goggles with DJI Go 4. Power on the Mavic Pro remote controller and aircraft and the DJI Googles. Ensure that the remote controller is linked with the aircraft. Launch DJI Go 4, log into your DJI account. Update the firmware following the on screen instructions. Tap download now. The app will download the firmware and then update the firmware.
DJI Goggles - Updating the Firmware
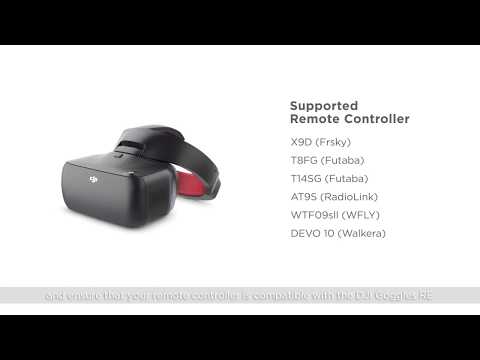
This video will show you how to connect a third party remote controller and flight controller. 1. Connecting a third party remote controller to DJI Goggles RE. Check supported remote controllers in the quick start guide and ensure that your remote controller is compatible with DJI Goggles RE. Connect 1 end of the cable to the coach port of the remote controller and the other end to the 3.5mm audio port on the DJI Goggles RE. Set the DJI Goggles to coach mode. 2. Connecting the third party flight controller to the DJI OcuSync Air Unit. Check supported flight controllers in the quick start guide and ensure that your flight controller is compatible with DJI OcuSync Air Unit. Connect the DJI OcuSync Air Unit power (9-16.8V) port and power GND to the positive and negative poles of the battery. Connect the UART_RX port on the Air Unit to the OSD TX port on the flight controller and the UART_TX port to the OSD_RX port. Connect the S.BUS and signal GND to the RX port on the flight controller and GND. Note: Set the flight controller to the S.BUS mode. Restart the flight controller and DJI OcuSync Air Unit. Then the connection is complete.
DJI Goggles RE - Connecting a Third-party Remote Controller and Flight Controller

DJI OcuSync Air Unit Activation. Connect the DJI OcuSync camera. Connect the DJI OcuSync Air Unit power port and power GND port to a power source (9-16.8V). Ensure that the linking status indicator turns on. Connect the Air Unit to the PC with a USB cable. Launch DJI Assistant 2. Log into your DJI account. Click DJI OcuSync Air Unit. Click start activation and confirm your account. The activation is complete. Notes: Be aware that the temperature of the Air Unit will increase to around 70 degree Celsius after the Air Unit has been in operation for 10 minutes if there is not external cooling equipment present.
DJI Goggles RE - Activating the DJI OcuSync Air Unit
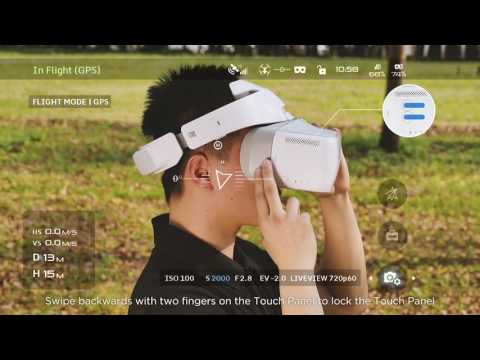
This video will show you the DJI Goggles main screen and how to operate it. What does the main screen show? The main screen of the goggles provides an overview of the device’s information and functions/ you’ll have real time information at a glance as you fly your aircraft. Enjoy the flight. How to operate the touch panel. The touch panel will respond to the following 3 gestures. Tap the touch panel, swipe with 1 finger on the touch panel, swipe with 2 fingers on the touch panel. Swipe forwards, backwards, upwards or downwards to view features on the main screen. When the camera settings/shoot/record button is selected tap the touch panel to select a feature or to turn on or off a setting. Swipe backwards with 2 fingers on the touch panel to lock the touch panel. Swipe forward with 2 fingers on the touch panel to unlock the touch panel. Swipe downwards with 2 fingers on the touch panel to enter the shortcut menu. Swipe upwards with 2 fingers on the touch panel to exit the shortcut menu. There are 3 buttons on the bottom of the DJI Goggles: the back button, function button and link button. And here is he IPD (interpupilary distance) knob. After you master the DJI Goggles you will be thrilled with the immersive experience of flying with the Goggles.
DJI Goggles - Introduction to the Main Screen and Basic Operations
