DJI CrystalSky
Two videos help owners of the high-performance Cendence controller. One explains the process for updating firmware using the DJI Go 4 app. The other shows how to remove the longer-range but highly directional patch antenna, if you have one, and replace it with the standard antennas.
This video will show you how to mount the Crystal Sky monitor. Materials: one 7.85inch Crystal Sky, one remote controller mounting bracket, one battery, two M5 screws, one M4 screw, one M6 screw, one Aspire 2, one slotted screwdriver. Remove the device holder on the Aspire 2 remote controller with a slotted screwdriver. Unlock the mounting bracket and separate Part A and Part B. mount Part B to the remote controller and tighten it with the M6 screw and M4 screw. Connect the USB cable to Part B o the mounting bracket to the USB port on the back of the remote controller. Mount Part A to the monitor and tighten it with the 2 M5 screws. Press the battery level button once to check the battery level. The battery level can be used 4 – 5 hours after it is fully charged. Put the battery into the battery slot and slide it to the right until you hear a click. The battery can be used directly after it’s mounted. There is no need to press the power button to turn on the battery. To remove the battery press the battery release button before removing the battery then slide it to the left. Install part A into Part B and lock the mounting bracket. Turn the screw on the left of Part B to adjust the tightness of the pitch axis until suitable viewing angle has been achieved. After connecting the mounting bracket and connecting Crystal Sky’s monitor to the remote controller power on the remote controller and the monitor will turn on automatically. After the Crystal Sky powers on launch DJI Go or DJI Go 4.
DJI CrystalSky - Mounting the CrystalSky Monitor

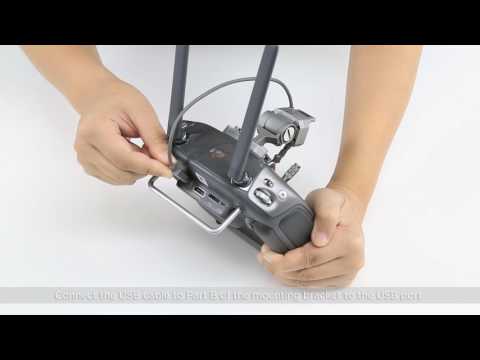
This video will show you how to mount a 5.5 inch Crystal Sky onto the Mavic series Spark remote controller. unlock the mounting bracket and loosen the 2 screws. The mounting bracket include 3 parts: Part A, Part B and Part, C. Remove the RC cable on the left side of the remote controller. Place Part C in the mobile device clamps and move the cable frame to the right as shown. Fasten the mobile device clamps. Connect the USB cable on Part B to the USB port on the remote controller. Mount Part B to the remote controller and tighten it with screws. Mount Part A to the 5.5 inch Crystal Sky monitor and tighten with the M5 screws. Put the battery into the battery slot and slide it to the right until you hear a click. The battery can be used directly after it is mounted. Unlock Part B and install Part A to Part B. Lock the buckle. Power on the remote controller and the monitor will turn on automatically. Press the settings buttons on the screen as shown. Tap flip screen and the monitor can be used normally.
DJI CrystalSky - Monitor to a Remote Controller (Mavic / Spark)
