DJI Mavic
Get up to speed quickly with videos on the foldable DJI Mavic, Mavic Pro and Mavic Platinum. Start with videos showing how to calibrate the IMU, install your mobile device to the remote controller, and charge the remote. Follow a video-recorded preflight checklist. You can also see how to charge the Mavic’s Intelligent Flight Battery with a charger or up to four batteries with a charging hub. Having trouble with your remote controller? Learn how to re-calibrate it and export remote controller data using DJI Assistant 2 so it can be analyzed. There are also demonstrations on upgrading and downgrading firmware, entering WiFi mode on the Pro, and attaching propeller guards.

During a flight, RTH can be triggered by the following conditions: pressing the return to home (RTH) button on the controller. Tapping the RTH button in DJI Go 4. Failsafe RTH. Low battery RTH. 3 factors affect the safe return of the aircraft: home point, the horizontal distance between the drone and home point. Flight height and RTH altitude. Scenario 1: Horizontal distance <5m. Scenario 2: 5m< horizontal distance<20m. Flight height<10m. Scenario 3: 5m< horizontal distance <20m. Flight height >10m. Scenario 4: Horizontal distance >20m flight height>RTH altitude. Scenario 5: horizontal distance.20m flight height<RTH altitude. Next we will set the RTH altitude to 30m and show the Mavic Pro these 5 RTH scenarios. RTH procedures. The Mavic can return to the home point when the lighting conditions are sufficient for the forward vision system to work. The drone will slow done when it detects an obstacle 15m ahead of it. When the drone is 5m above the obstacle it will stop ascending and then continue to fly to the home point. Horizontal distance<5m. The drone hovers in place and waits for the pilot’s confirmation for about 3 seconds. The aircraft lands directly. 5m< horizontal distance<20m. Flight height<10m. The drone hovers in place and waits for the pilot’s confirmation for about 3 seconds. The aircraft will ascend to 10m first, turn its nose direction to the home point and return to the home point at 4m/s. at this moment the Mavic can ascend to avoid obstacles. When the drone arrives at the home point it will start landing. 5m<horizontal distance<20m flight height>10m. The drone hovers in place and waits for the pilot’s confirmation for about 3 seconds. Turn its nose direction to the home point and the Mavic will return to home at its current height with obstacle avoidance function enabled. When the drone arrives at the home point it will start landing.
Horizontal distance <20mflight height>RTH altitude. The drone hovers in place and waits for the pilot’s confirmation for about 3 seconds. Turn its nose direction to the home point and the Mavic will return to home at its current height with obstacle avoidance function enabled. When the drone arrives at the home point it will start landing. Horizontal distance>20m flight height<RTH altitude. The drone hovers in place and waits for the pilot’s confirmation for about 3 seconds. The aircraft will ascend to 20m first and turn its nose direction to the home point. Then it will continue to ascend to the present RTH height. The Mavic will immediately return to the home point at a flight speed of 10m/s.
DJI Mavic - RTH Logic

This video will show you how to calibrate the IMU on your DJI Mavic. Before calibration please do the following. Install the latest DJI Go app. Ensure aircraft battery is greater than 50%. Calibrating the IMU, turn on the remote controller and connect it with the mobile device. Place the aircraft on a level surface with its arms folded and turn on the aircraft. Launch the DJI Go app, enter the camera view. Go to main controller settings, advanced settings, sensors, IMU and tap calibrate IMU. Position the aircraft following the instruction in the DJI Go app during calibration. Tap start calibration. Calibrate in 5 different direction one after another. After calibration is complete IMU calibration complete will pop up in the DJI Go app. Tap back to camera.
Make sure not to start the motors with the combination stick command. IMU calibration will fail if the aircraft is not positioned according to the instructions in the DJI Go app. If calibration fails please restart the aircraft and calibrate the IMU again.
Mavic Tutorials- IMU Calibration
This video will show you how to charge the Mavic remote controller. There is a micro USB port on the left of the remote controller. Remove the USB cable, connect the remote controller and charger with the Micro USB cable and the remote controller will start charging. The USB port on the bottom of the remote controller cannot be used for charging. It can only be used to connect a mobile device o which the DJI Go app is running.
Mavic Tutorial Video - How to Charge the Remote Controller
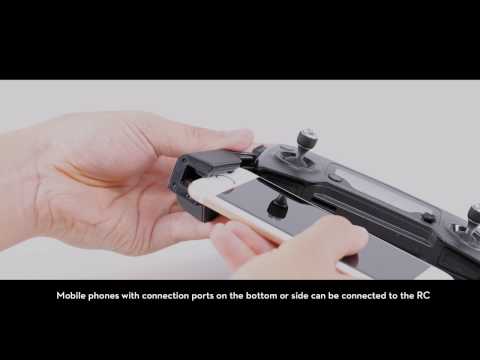
The DJI Mavic Pro is a small yet powerful drone that turns the sky into your creative canvas easily and without worry helping you make every moment an aerial moment. This video will show you how to connect a mobile device to your Mavic’s remote controller. After the remote controller is fully charged unfold the mobile device clamps. Align the side connection cable with the port on your mobile device. The insert the mobile device into the left device clamp. Insert the mobile device into the right clamp to secure it. There are 2 positions for the side connection cable. Choose whichever position is most suitable for your mobile device. Also check to make sure the home button of your device is positioned as shown. You can connect your mobile device to either side or the bottom USB port. The Micro USB port on the left or the remote controller can be used for charging or connecting a mobile device. The USB port on the bottom of the remote controller is just used for connecting a mobile device. Mobile phones with connection ports on the bottom or side ca be connected to the RC. If you’re using the UBS port on the bottom the USB cable connected side port should be removed. After flight hold the left clamp and disconnect the mobile device. Then fold the device clamps.
DJI Mavic Pro - How to Install the Mobile Device

In this video we will show you how to exporting remote controller data. The Mavic Pro stores 2 kinds of data, aircraft data and remote controller data. If you’re having issues with your remote controller DJI support may request your remote controller data for analysis. Download DJI assistant 2 from the official DJI website and install it. Connect the remote controller to your computer with a USB cable. Launch DJI assistant 2. Power on the remote controller. Click black box in DJI assistant 2. Click save to local and create a folder t which you’ll save the data. When export complete is shown in the app open your data folder to see all the exported remote controller data. Users cannot open the data files as they are encrypted. Please upload the contents of the folder to a cloud storage website and send the link to DJI support.
DJI Mavic Pro – Exporting Remote Controller Data with DJI Assistant 2
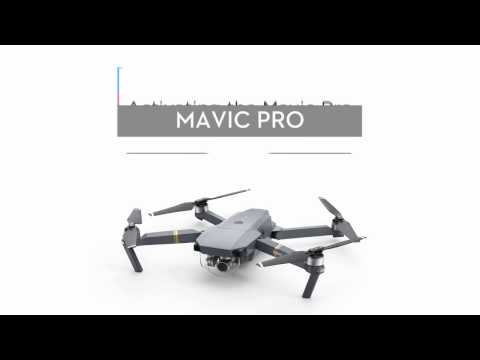
This video will show you how to activate your Mavic Pro. Connect your mobile device and remote controller. Power on the remote controller and the Mavic Pro. Launch DJI Go 4. An activation prompt will pop up when connecting with DJI Go 4 for the first time. Tap next and name your Mavic Pro. After you’ve named your aircraft tap continue and set a stick mode. The default stick mode is mode 2. You can set a customized mode under remote controller setting after activation. Tap continue. Next you can assign various commands to the C1 button and the C2 button on the back of the remote controller. Tap continue to view and LCD screen introduction. Tap continue and select your desired measurement system and video format. Tap continue to enter beginner mode settings. The aircraft is set to beginner mode by default. In the beginner mode the aircraft won’t takeoff with GPS signal and the flight altitude and distance will be limited to 98 feet or 30 meters. Tap continue to confirm your account’s email address. Please note that the account you used to activate your Mavic Pro cannot be changed later. The aircraft’s information will be bound to your account permanently. Your account will serve as proof of your warranty when you apply for service. Your Mavic Pro has now been activated
DJI Mavic Pro - Activating the Mavic Pro

This video will show you how to calibrate your Mavic remote controller. All Mavic remote controllers are calibrated before delivery. But if your remote controller is malfunctioning it may need to be calibrated. Before you calibrate please note the following: 1. Do not power on the aircraft during calibration. 2. Make sure the control sticks are centered. 3. Do not calibrate near metal objects. 4. Calibration takes approximately 60 seconds. If the app prompts that calibration has timed out after 60 seconds please try calibrating again. First connect the remote controller to your mobile device. Then turn on the remote controller and launch the DJI go app. Press the remote controller icon and choose RC calibration. Tap calibrate, make sure both control sticks are centered and tap the start button. Read the warning message and press ok. Rotate the control sticks in every possible direction according to the direction shown in the app. Ensure each stick has gone through its entire range of motion. Then rotate the dial and fill the progress bar in each direction as shown in the app. Tap finish. Remote controller calibration is now complete.
DJI Mavic Pro - Remote Controller Calibration
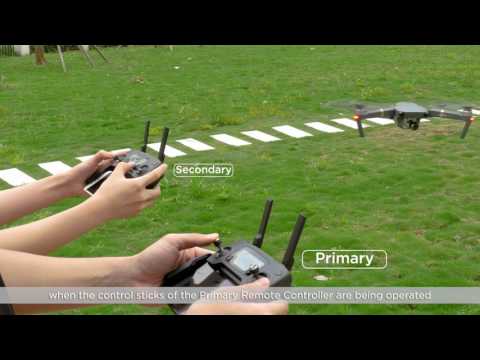
DJI Mavic Pro – Dual Remote Controller Mode
DJI Mavic Pro – Dual Remote Controller Mode
This video will show you some steps you can take to make sure your aircraft flies safely and reliably. 1. Checking the gimbal. Check if the vibration absorbing board is mounted properly. If not gimbal land camera stability may be affected. 3 anti-drop hooks are located at the front left, front right and rear of the gimbal. Ensure the vibration absorbing board is mounted to all 3 of the hooks before takeoff. 2. Checking the frame. The Mavic’s foldable design makes it portable and convenient. But please make sure to not do the following things: do not power on the motors while the aircraft’s arms are folded. Do not conduct compass calibration while the aircraft’s arms are folded. The aircraft may fly unstably if it’s powered on while the arms are folded. It’s recommended to unfold the arms first then power on the aircraft. For your own safety, do not hand launch the Mavic or throw the Mavic and start the motors in the air. Make sure to only launch the Mavic from level ground.
DJI Mavic—Preflight Checklist
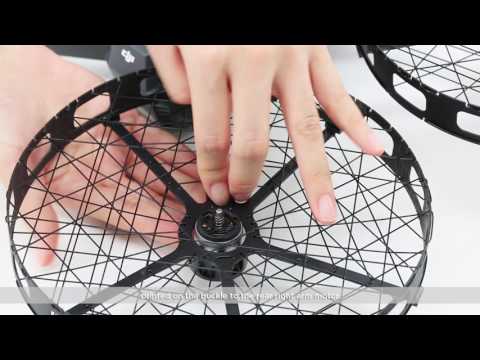
This video will show you how to mount the Mavic Pro Propeller Cages. Please keep in mind the following notices before mounting the propeller cages. There are digits on the propeller cage back wall lower bracket and outer ring bracket. Note that #1 is oriented on the front right arm. 2 on the front left arm. 3 on the rear left arm and 4 on the rear right arm. Do not mount them wrongly. Mount the propeller cages after unfolding the arms. After mounting the propeller cages do not fold the arms. Pease use propeller cages together with 7728 quick release folding propellers. Perform the following steps to mount the propeller cages. First remove the propeller from the aircraft. Open the buckle. Mount the propeller cage with #1 printed on the buckle to the front right arm motor. Fasten the buckle. When the click is heard the propeller cage is mounted firmly. Perform the proceeding steps to mount the propeller cage with #4 printed on the buckle to the rear right motor. After mounting, fix the front arm propeller cage and the rear arm propeller cage with the securing lock as shown. Perform the same steps to mount the left propeller cages.
After mounting propeller cages launch DJI Go 4. Go the main controller setting, advanced settings, and turn on propeller cage. Mounting the 7728 quick release folding propellers. Note that the white ringed propeller is for the motor with white marks. While the propeller without a white ring is for the motor without white marks. Pinch the side hole of the propeller cage to fix motor. Mount the folded propeller to the propeller cage and align the propeller with the motor as shown. Press down and turn the propeller to lock the direction until it is secured in its position. Unfold propellers and check whether the propellers scratch the propeller cage. Perform the proceeding steps to mount the other propellers.
Mavic Pro – Mounting Propeller Cages
The firmware on your Mavic can be upgraded with the DJI Go app or DJI Assistant 2. This video will show you how to upgrade with the DJI Go app. Before upgrading please do the following: Install the latest DJI Go app. Ensure that your mobile device can be connected to the internet. Ensure that your mobile device is connected with the aircraft and the remote controller. The DJI Go app will check whether or not an upgrade is available. A prompt will be displayed on the aircraft status bar if so. Tap update now to enter the upgrade screen. Tap download. After the firmware package has downloaded tap start update. When the upgrade is complete update complete will be displayed in the DJI Go app. Tap complete. You can update the firmware on your remote controller following the same steps.
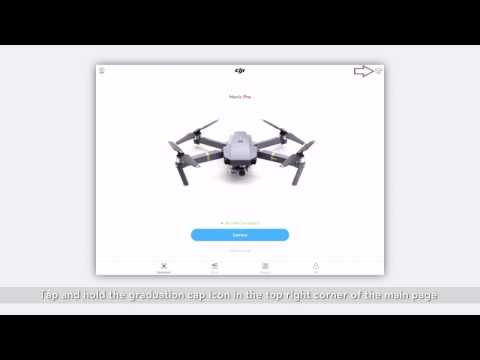
Upgrade/downgrade. You can upgrade or downgrade the firmware as required. Downgrading ill fail to be conducted if the firmware cannot be downgraded. Tap and hold the gradation cap icon in the top right corner of the main page to enter the upgrade. Downgrade screen. Choose the firmware version you want and tap start update. Update progress will be displayed in the middle of the screen. Upgrade failure and troubleshooting. When the firmware of 1 module isn’t consistent with others an inconstant firmware warning will pop up in the DJI Go app. For example if a battery’s firmware is inconsistent with the aircraft’s firmware it will pop up. Firmware consistency is important to make sure the aircraft runs smoothly. The warning will appear when the aircraft is in either Wi-Fi mode or the remote controller mode.
Upgrading cannot be conducted hen battery life is lower than 50% for the aircraft or remote controller. Please ensure your aircraft and remote controller batteries are fully charged before upgrading. Upgrading will fail fi the mobile device turns off during an upgrade. Restart the device and upgrade again. It is normal for the Mavic to restart several times during upgrading. If the remote controller is connected with the aircraft they will connect and discontent from each other twice.
Mavic Tutorials- Upgrading/Downgrading Firmware with DJI Go App
The firmware on your Mavic can be upgraded with the DJI Go app or the DJI Assistant 2. This video will show you how to update with DJI Assistant 2. Before upgrading please do the following: Download and install DJI Assistant 2. Ensure your PC is connected to the internet. You can use DJI Assistant 2 to upgrade the remote controller and aircraft respectively. Or upgrade them together when they are connected to each. Note: Upgrading firmware on the remote controller will take about 5 minutes. Upgrading the firmware on the aircraft will take about 10 minutes. The remote controller and aircraft will upgrade when they are connected to each other with a USB cable. The process will take about 15 minutes total. Upgrading firmware on the aircraft. Connect the aircraft to your PC with a USB cable. Power on the aircraft. Run DJI Assistant 2. Log into your DJI account. If you don’t have a DJI account register on the official website. Click firmware upgrade on the left. Select the firmware version to which you’d like to upgrade. Click start upgrade and wait for the firmware package to be downloaded. The upgrade will start automatically after the download finishes.
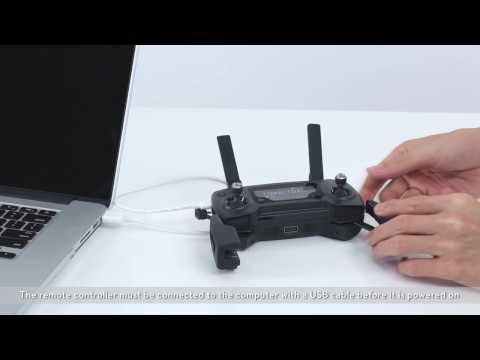
Upgrading firmware on the remote controller. Connect the remote controller to your PC with a USB cable. Turn on the remote controller. Please note: the remote controller must be connected to the computer with a USB cable before it is powered on. Run DJI Assistant 2. Click start upgrade and wait for the firmware package to be downloaded. The upgrade will start automatically after this download finishes. The remote controller does not need to be connected with the aircraft when bring upgraded separately. Upgrade failure and troubleshooting. Upgrading cannot be conducted when the battery life is lower than 50% for the aircraft or remote controller. Please ensure your aircraft and remote controller batteries are fully charged before upgrading. Upgrading will fail if the Mavic is turned off during an upgrade. If this happens restart the Mavic and upgrade again. It is normal for the Mavic to restart several times during upgrading. If the remote controller is connected with the aircraft they will connect and disconnect from each other twice. If the internet disconnect while you’re downloading a firmware package the upgrade will fail. If this happens please reconnect to the internet and disconnect the aircraft and the upgrade will finish downloading. After the upgrade is complete reconnect the aircraft to the PC and the upgrade will complete.
If the aircraft and remote controller fail to be upgraded repeatedly when they are connected or the aircraft cannot be linked to the remote controller the firmware of the aircraft and RC may be inconsistent. In this case, upgrade the aircraft and remote controller respectively to the latest version with DJI Assistant 2
Mavic Tutorials- Upgrading/Downgrading Firmware with DJI Assistant 2
This video will show you how to activate the Mavic Pro Platinum. Connect your mobile device and remote controller with the USB cable. Power on the remote controller and the aircraft. Launch DJI Go 4, an activation prompt will pop up. Tap next and read the terms of use carefully. Name your Mavic Pro Platinum. After you’ve names your aircraft tap continue and set a stick mode, the default stick mode is mode 2. You can set a customized mode under remote controller setting after activation. Tap continue. Next you can assign various commands top the C1 button and C2 button on the back of the remote controller. Tap continue to view to LCD introduction screen. Tap continue and then select your desired measurement system and video format. Tap continue to enter beginner mode settings. The aircraft is set to beginner mode by default. I beginner mode the aircraft wont takeoff without GPS signal and flight altitude and distance will be limited to 98 feet or 30 meters. Tap continue to conform your account’s email address. Please note that the account you use to activate your Mavic Pro cannot be changed later. The aircraft’s information will be bound to your account permanently. Your account will serve as proof of your warranty if you apply for customer service. Tap activate. Your aircraft has not been activated
Mavic Pro Platinum – Activating the Aircraft

This video will show you how to update the firmware with a PC. Remove the propeller before updating the firmware with the DJI Assistant 2. It is recommended to fully charge the battery and then update the firmware. If the battery level is less than 505% of the total power the firmware cannot be updated. 1. Updating the aircraft and remote controller at the same time. Connect the remote controller to the PC with a USB cable. Power on the remote controller and aircraft. Ensure that the remote controller has been linked with the aircraft. Launch DJI Assistant 2, click the connected device. Log into your DJI account. Enter the firmware update screen and wait until the firmware list is shown on the screen. Select the latest firmware version. Click upgrade. Read the tips carefully. Click start update. The firmware package with start downloading. Do not disconnect the internet during the download otherwise the update may fail. Ensure that your PC is connected to the network. It is normal if the device disconnects from the PC automatically during the update. If the update fails several times to the aircraft cannot be linked to the remote controller then the aircraft firmware is inconsistent with the remote controller’s firmware. It is recommended to update the aircraft and remote controller to the latest versions respectively with DJI Assistant 2.
2. Updating the aircraft. Connect the aircraft to a PC with a USB cable. Power on the aircraft. Launch DJI Assistant 2, click connect to device. Enter the firmware update screen. Select the latest firmware version. Click upgrade. Click start update. The aircraft will start updating, it takes about 10 minutes to update the firmware. Please wait until update is complete. 3. Updating the remote controller. Connect the remote controller to the PC with a USB cable. Power on the remote controller. Do not connect the aircraft when updating the remote controller. Launch DJU Assistant 2. Click connect to device. Enter the firmware update screen and wait until the firmware list is shown on the screen. Select the latest firmware version. Click upgrade, click start update. The aircraft will start updating. Please wait unlit the update is complete.
DJI Mavic Pro Platinum - Updating the Firmware with a PC
This video will show you how to update your Mavic Pro Platinum’s firmware. Remove the propeller before the update and ensure that your mobile device is connected to the internet. Note that the aircraft remote controller cannot be updated if the remote controller’s power or aircraft’s power is less than 50%. It is recommended to fully charge the battery before the firmware update. Power on the aircraft and remote controller. Launch DJI Go 4. If a new firmware update is available a notification will be shown on the home screen of the DJI Go 4 if the firmware needs to be updated. Tap update now. Tap download now. When the download is completely it’ll start update. After the update is complete an update complete prompt will popup. If the firmware of some models such as batteries does not match aircraft firmware an inconsistent firmware found warning will be shown on the app. Slide slide to update to update the firmware. It’ll start updating. After the update is successful tap ok to restart the aircraft.
Mavic Pro Platinum – Updating the Firmware with DJI GO 4
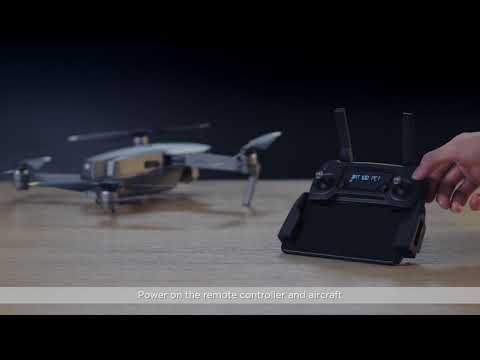
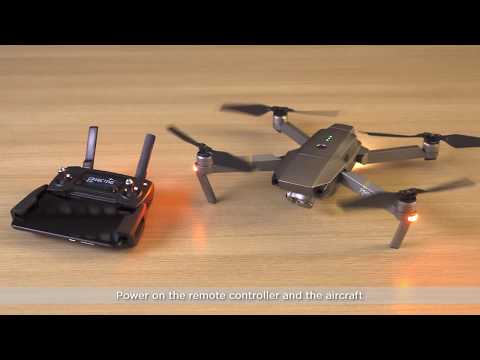
This video will show you how to link the Mavic Pro Platinum controller. When the remote controller is powered on and the aircraft status indicator blinks yellow quickly indicates the aircraft is not connected to the remote controller and linking is linking is required. Before linking toggle the control mode switch to RC mode. There are 2 ways to link the remote controller. 1. Linking the remote controller with the DJI Go 4. During linking it is recommended to place the remote controller within 2, of the aircraft. Power on the remote controller and aircraft. Connect the remote controller to the mobile device with the RC cable. After the connection launch DJI Go 4. Tap enter device and the remote controller icon on the screen. Tap linking remote controller and press the link button on the aircraft. When remote controller linked is shown on the screen remote controller has linked with the aircraft successfully. 2. Linking the remote controller without DJI Go 4. Power on remote controller and aircraft. Press the C1 button. C2 button and record button at the same time. When the remote controller starts beeping press the shutter button. Do not release the C1 button, C2 button and the record button. When the linking starts the remote controller will start beeping. Binding will be shown on the remote controller screen. Press the link button on the aircraft. When connecting is shown on the remote controller screen the aircraft status indicator will stop blinking yellow quickly once he remote controller is successfully linked to the aircraft. If linking fails several times contact DJI support
DJI Mavic Pro Platinum - Linking the Remote Controller
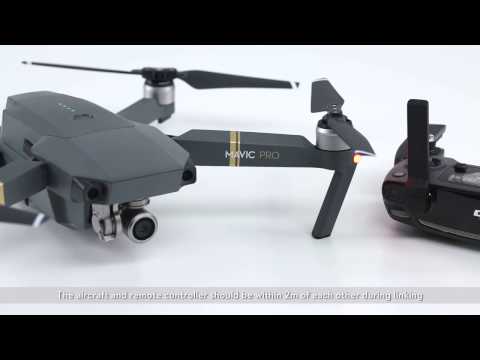
This video will show you 2 different ways to link you Mavic remote controller to the aircraft. The remote controller is already linked to your aircraft before delivery. Linking is only required when using a new remote controller for the first time or troubleshooting your aircraft. If the indicator at the rear of the aircraft flashes yellow quickly it means the aircraft is not connected to the remote controller or mobile device. Before linking please toggle the control mode switch to RC. Linking the RC via the app. Connect the remote controller and the mobile device with a USB cable. Power on the remote controller and the aircraft. Launch the DJI Go app, enter camera, select linking RC and press the link button on the Mavic. The app with display a notification indicating RC linking was successful and you’ll see the live camera feed on your mobile device. Linking the RC by pressing the C1, C2, record button and shutter button. Power on the remote controller and the aircraft. Press the C1 and C2 buttons on the back of the remote controller and the record button. When the remote controller makes the following sound, “D-DD” press the shutter button. The remote controller will beep quickly and display binding on the screen. Press the link button on the Mavic. When the remote controller display displays ready to go and the indicator at the rear of the aircraft flashes slowly the remote controller has linked successfully. Please note, hold the C1, C2 and record button before pressing the shutter button. The aircraft and remote controller should be within 2m of each other during linking. If linking fails repeatedly please contact DJI support.
Mavic Tutorials- Linking the Remote Controller
This video will show you how to charge the Mavic Pro’s battery. The Mavic Pro’s intelligent flight battery must be charged by a DJI approved charger or battery charging hub. The battery’s optimal charging temperature is 5 degrees Celsius to 40 degrees Celsius. The battery will stop charging if the cell’s temperature is not within the temperature range. Do not cover the charger or intelligent flight battery during charging. 1. Charging with a charger. Turn off the intelligent flight battery before removing it from the Mavic Pro. Connect the battery to the charger. The battery level indicators will blink and show the current battery level during the charging. When the battery is fully charged the battery level indicators will be all off. Remove the intelligent flight battery from the charge. The charging is complete.
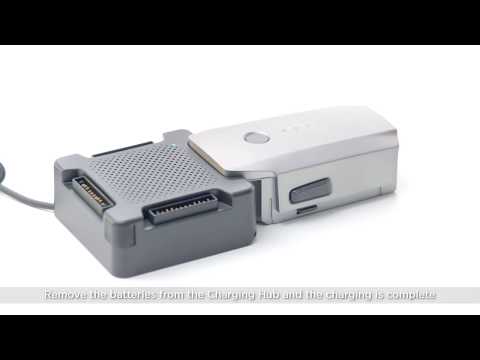
2. Charging with the battery charging hub. Connect the charger to the bottom power port on the charging hub and the status LED indicator will turn to solid yellow. Insert the intelligent flight battery into the battery port to start charging. The charging hub can charge up to 4 intelligent flight batteries at a time. The intelligent flight batteries with the highest power level will be charged first. During the charging the status LED will blink green slowly. When the status LED indicator is solid green all the batteries are fully charged. Remove the batteries from the charging hub and the charging is complete.
DJI Beginner Tutorial Videos - Mavic Pro – Charging the Battery
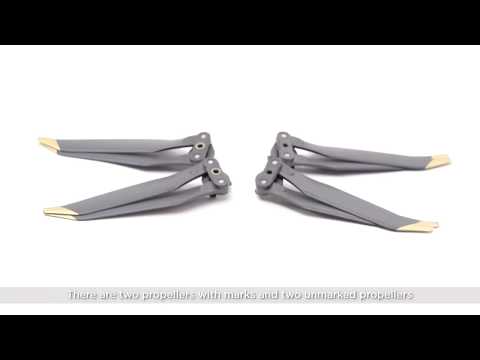
This video will show you how to mount and detach the propellers on the Mavic Pro. There are 2 propellers with marks and 2 unmarked propellers. The mark indicated in which direction the propeller should spin. Attach the marked propellers to the marked motor mounting bases. Press the propeller down into the mounting base and rotate it clockwise until it secured. Attach the unmarked propellers to the unmarked motor mounting bases and rotate anti clockwise to lock them. After installation hold the motors and rotate the propellers as shown to check whether they are mounted in place. To detach the propellers hold the motors press the propellers down into the motor mounting bases and rotate them in the unlock direction.
DJI Beginner Tutorial Videos - Mavic Pro– Mounting the Propellers
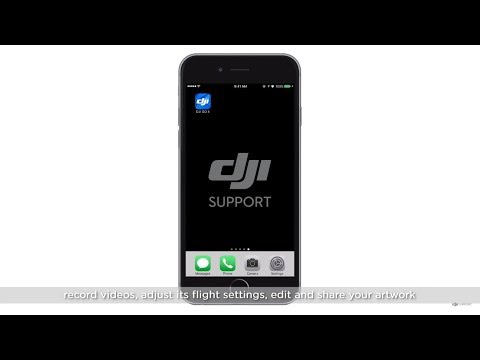
Mavic Pro, introduction to DJI Go 4. DJI GO 4 is a powerful app which you can use to control the Mavic Pro, capture phots, record videos, adjust its flight settings, edit and share your artwork. Launch DJI Go 4 and enter the main screen. You will see 4 icons at the bottom of the main screen, equipment, editor, skypixel and me. Your aircraft model is shown in the upper left corner of the equipment page. Tap start flight in the lower right corner of the screen to enter the camera view. Tap the icon in the upper right corner to view the Mavic Pro’s related functions. Tap scan QR code to activate or connect a device. Tsp academy to enter the flight simulator view tutorial videos and documents. Tap flight record to view your flight records under your DJI account. Tap no fly zone to check the no fly zones in each country or region. For Android devices, downloading offline maps is supported. Tap find my drone to find your lost aircraft. Enter the editor to edit your photos and videos and share them on social media. Go to skypixel to see stunning photos or videos from around the world. On the me page you will see the DJI store, flight records, DJI forum and DJI support. Tap DJI support and then you can access online service or online repair request. You can also adjust the app settings on the me page.
DJI Beginner Tutorial Videos - Mavic Pro - Introduction to DJI GO 4
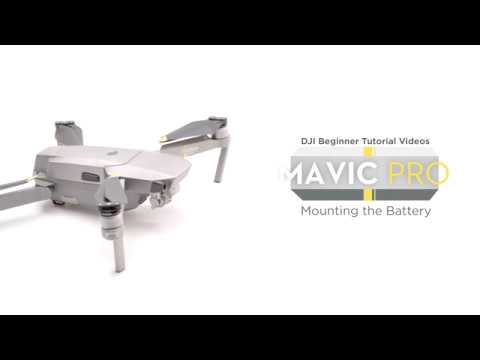
This video will show you how to install the intelligent flight battery. Mount the battery when the Mavic’s arms are unfolded. Place the intelligent flight battery into the battery compartment. Push the battery to the end and a click will be heard. Check whether the battery is firmly mounted. To remove the battery hold the front of the aircraft with 1 hand, press the buckles on both sides of the battery and pull out the battery.
DJI Beginner Tutorial Videos - Mavic Pro– Mounting the Battery
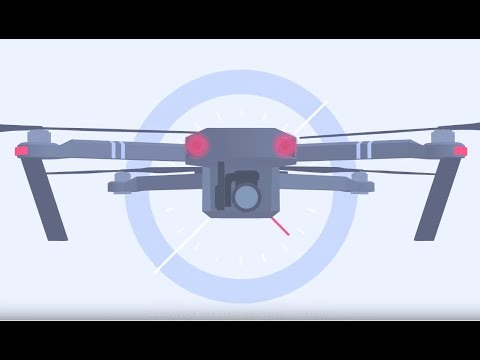
Mavic Pro key components. Located on the aircraft’s nose the forward vision system inducing 2 vision sensors allows the aircraft to avoid obstacles in front of it and enhances flight safety. The 3 axis gimbal mounted to the bottom of the aircraft’s nose provides a steady controllable platform for the attached camera, keeping the camera stable during attitude changes when flying allowing you to capture stable images and videos and change the camera’s shooting angle. Located on the rear of the gimbal the cooling system can quickly cool the internal circuit helping all components to work stably and reliably. The bottom of the aircraft has the ultrasonic sensors and the downward vision system which helps the aircraft maintain its current height and position accurately at a certain altitude and under proper lighting conditions. Using the downward vision system the aircraft can hover precisely even without GPS signal. The Micro USB port on the left of the aircraft can be used for connecting the aircraft to your computer to read data and update the firmware.
Open the cover on the right of the aircraft and the camera Micro SD card slot, linking status indicator, link button and control mode switch can be seen. The intelligent flight battery is mounted on the back of the aircraft and it is the power source of the aircraft. There is a buckle on the left and ride sides of the battery to mount it to aircraft securely. The aircraft status indicator at the rear of the aircraft can be used to determine the aircraft status according to its blinking color and frequency. For more details about the aircraft status indicator refer to the user manual. The front LEDs located below the 2 front motors show the orientation of the aircraft
Mavic Pro | Key Components
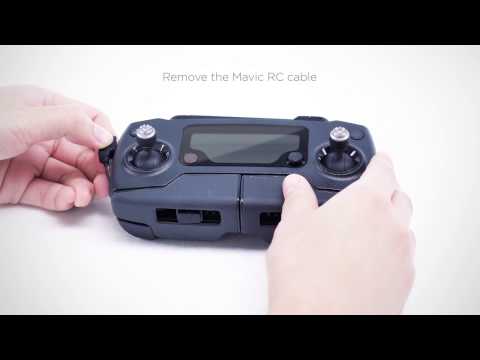
Mavic Pro charging the RC. Remove the Mavic RC cable. Connect the Mavic remote controller to the Mavic charger, insert the Micro USB as shown. It will take about 2.5 hours to charge the remote controller.
Charging the Remote Controlle
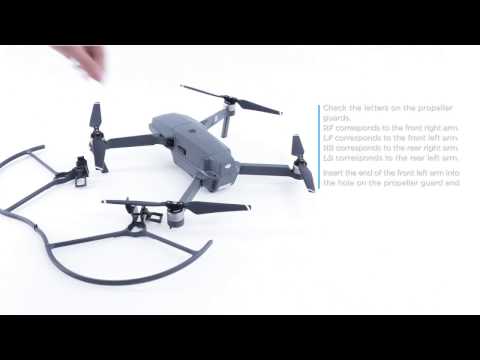
Mavic Pro, attaching propeller guards. Check the letter on the propeller guards. RF corresponds with the front right arm. LF corresponds with the left front arm. RB corresponds with the rear right arm and LB correspond with the rear left arm. Insert the end of the front left arm into the hole on the propeller guard and align the end of the rear left arm with the other hole. Tighten plastic buckles as shown. Perform the same steps to attach the propeller guards to the arms on the other hole. Installation is now complete.
DJI Mavic Pro – Attaching Propeller Guards
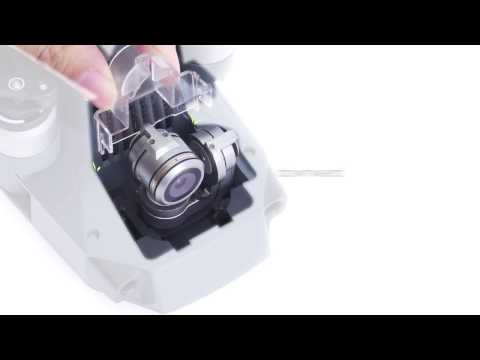
Mavic Pro, attaching gimbal clamp. With the Mavic Pro powered off place it on a level surface with its camera facing upward. Align the gimbal clamp with the pitch – axis cable cover. Hold the gimbal with one hand and the gimbal clamp with your other hand and push the clamp downward.
Attaching the Gimbal Clamp
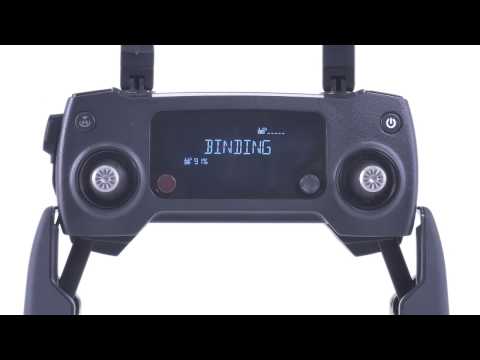
Mavic Pro, linking the remote controller without the DJI Go 4. With the control mode switch set to RC mode turn on the remote controller. Power on the aircraft. Press the C1 button, C2 button and record button at the same time. When the controller starts beeping press the shutter button. Binding will be displayed on the remote controller screen. Press the linking button. The indicator at the rear of the aircraft will stop flashing yellow quickly once the remote controller is successfully linked to the aircraft.
Linking the Remote Controller without DJI GO 4
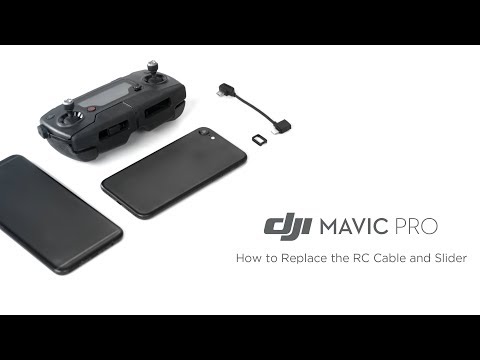
Unfold the remote controller’s left mobile device clamp. Pull out the cable’s connector from the Micro-USB port on the left side. Push out the other connector from the RC cable slider to completely remove the wire. Push the slider frame out by pressing on it from inside. A new slider needs to be mounted from the outside of the left clamp. Position the slider so the grove is facing inside. Place the lower part of the slider into the frame. Press down the upper part to mount the slider. Mount the RC cable’s connector to the slider from the inside of the clamp. Insert the other connector into the Micro-USB port and slowly press down the wire to the cable slot. The RC cable is now replaced
DJI Mavic Pro – How to Replace the RC Cable and Slider
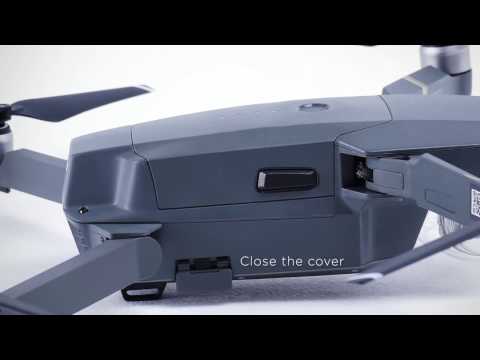
Mavic Pro, entering Wi-Fi mode. Open the SD card slot cover. Toggle the control mode switch left to Wi-Fi position. Close the cover. Power on aircraft. Turn on your mobile device’s Wi-Fi, select the corresponding Wi-Fi network. Enter the password and tap join. Your mobile device is now connected to the Mavic’s network
Mavic Pro - Entering Wi-Fi Mode
